Issue and send a document
Issue a draft to give it its number and lock it, email it to the client in the same step, and mark documents you delivered yourself as sent.
Issuing turns a draft into a real document: it gets its number, its date and its final totals, and it can no longer be changed. You can email it to the client in the same step.
Issue a draft
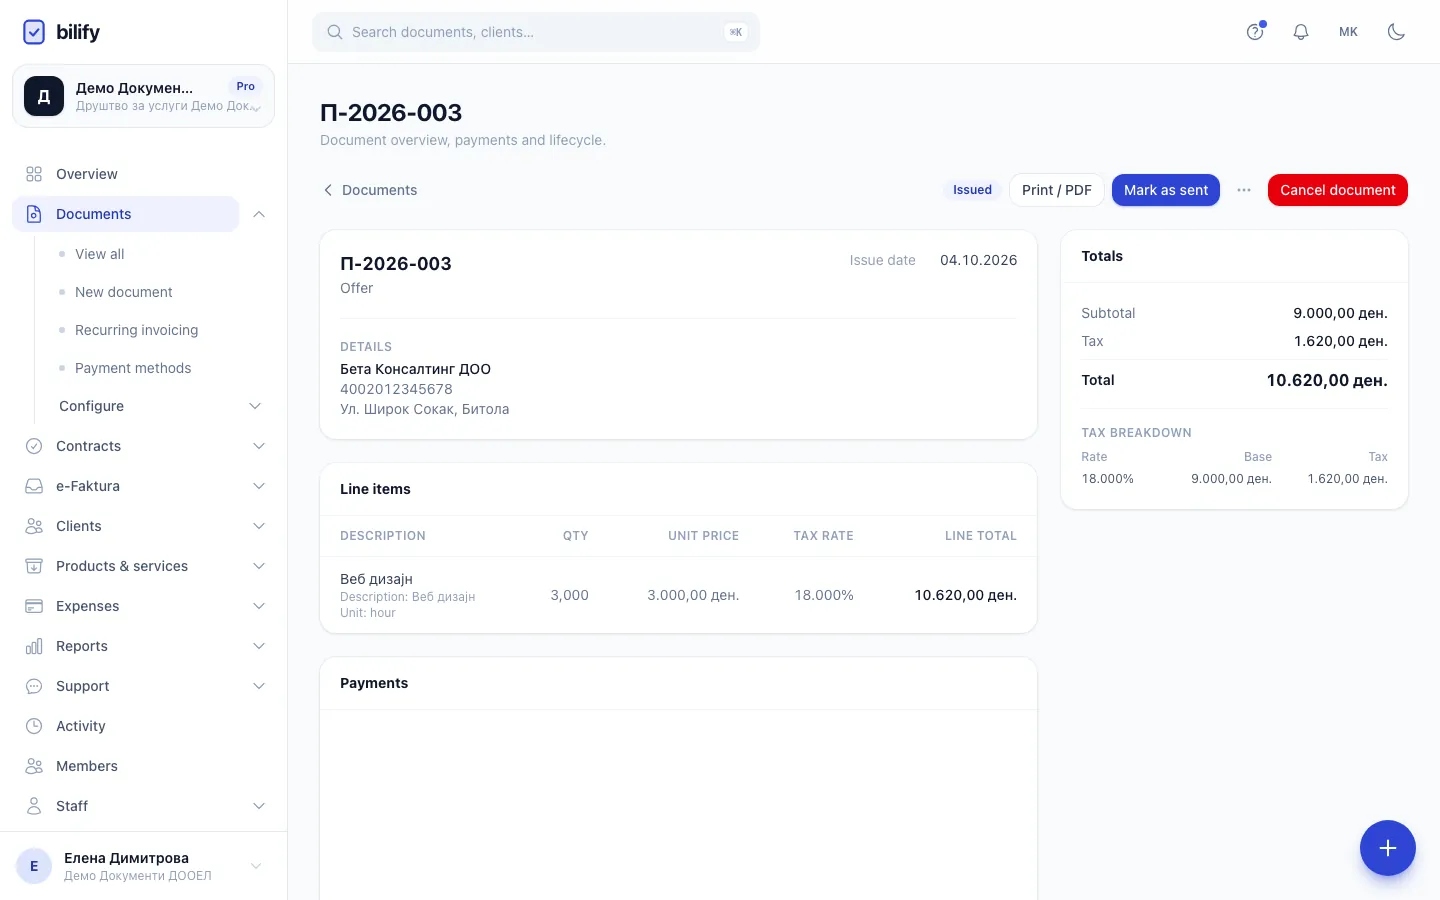
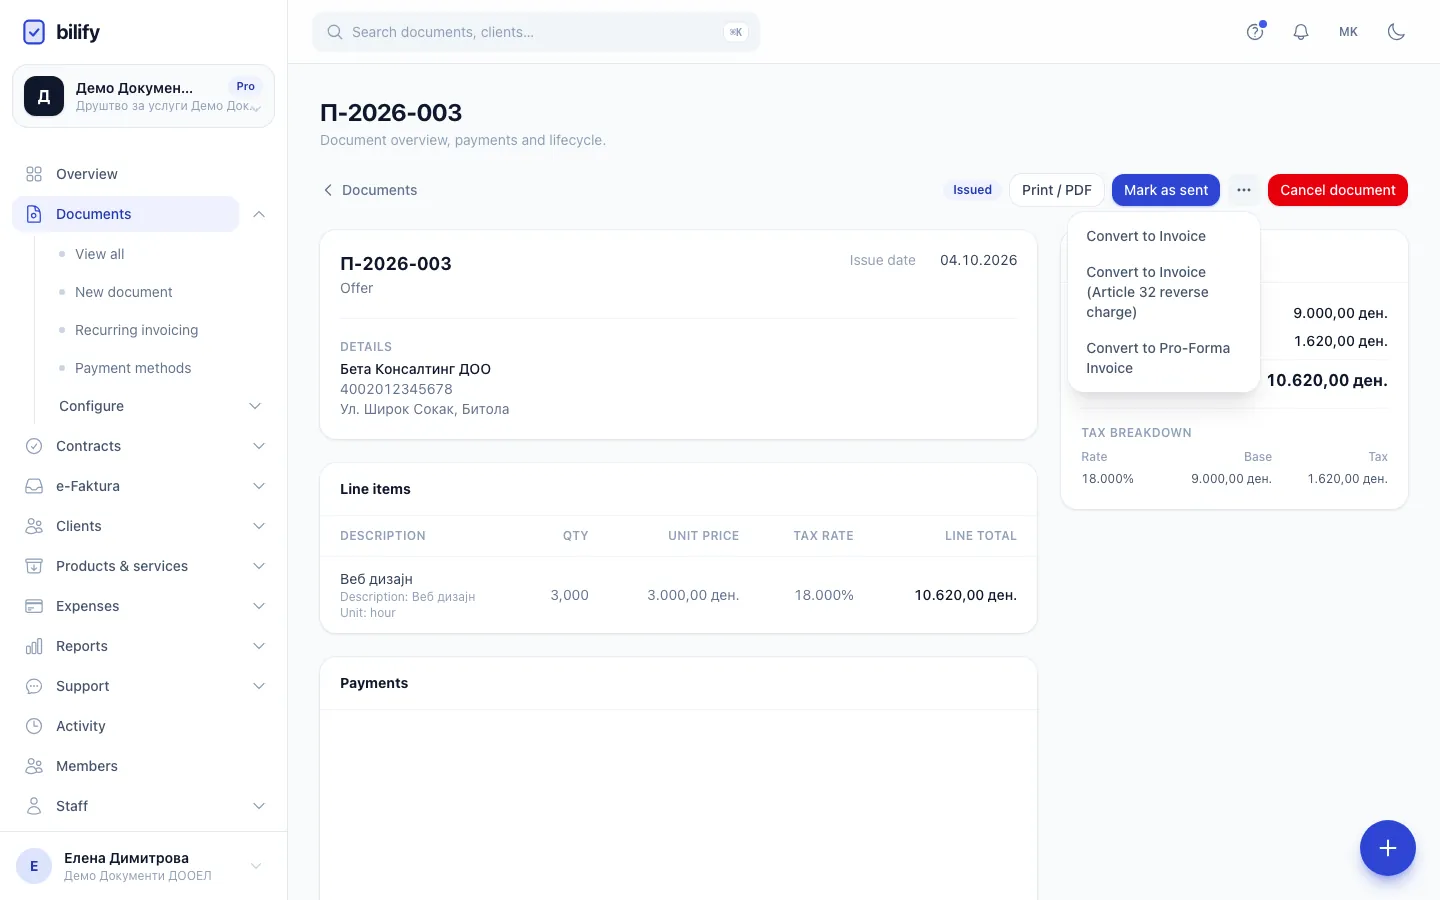
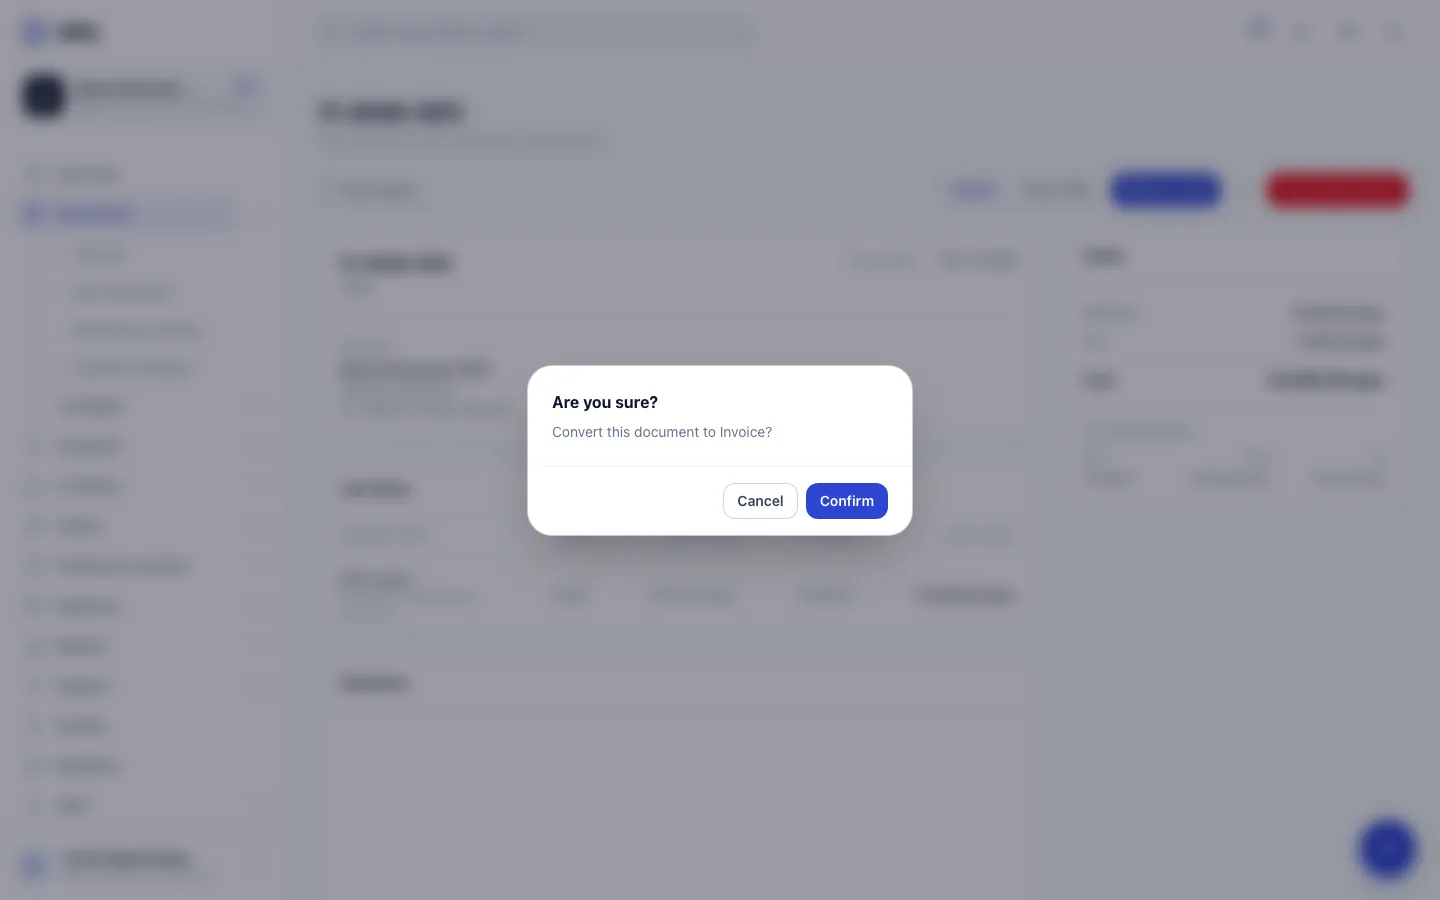
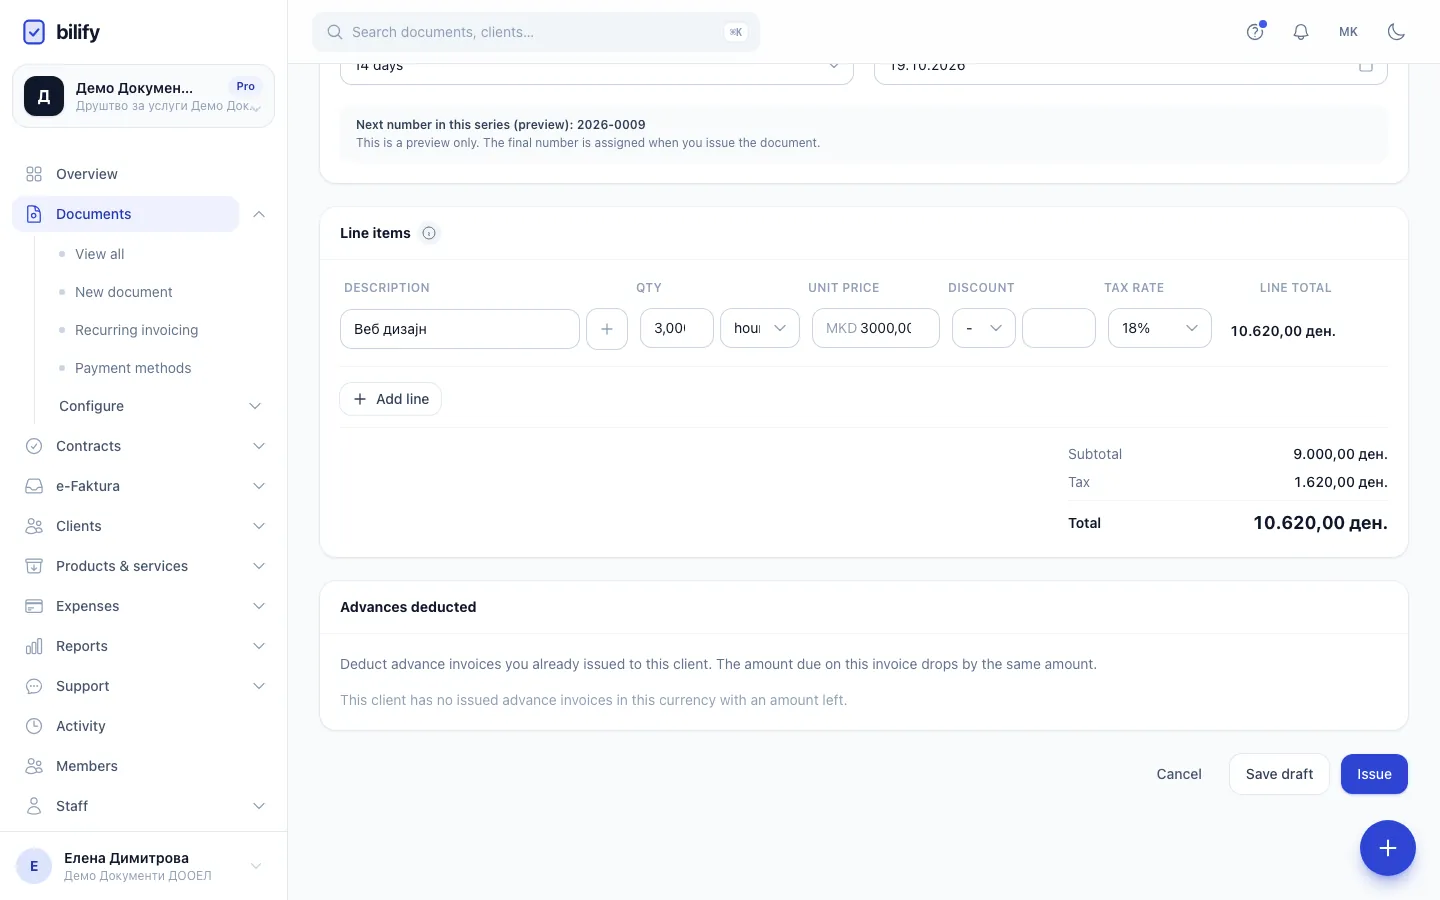
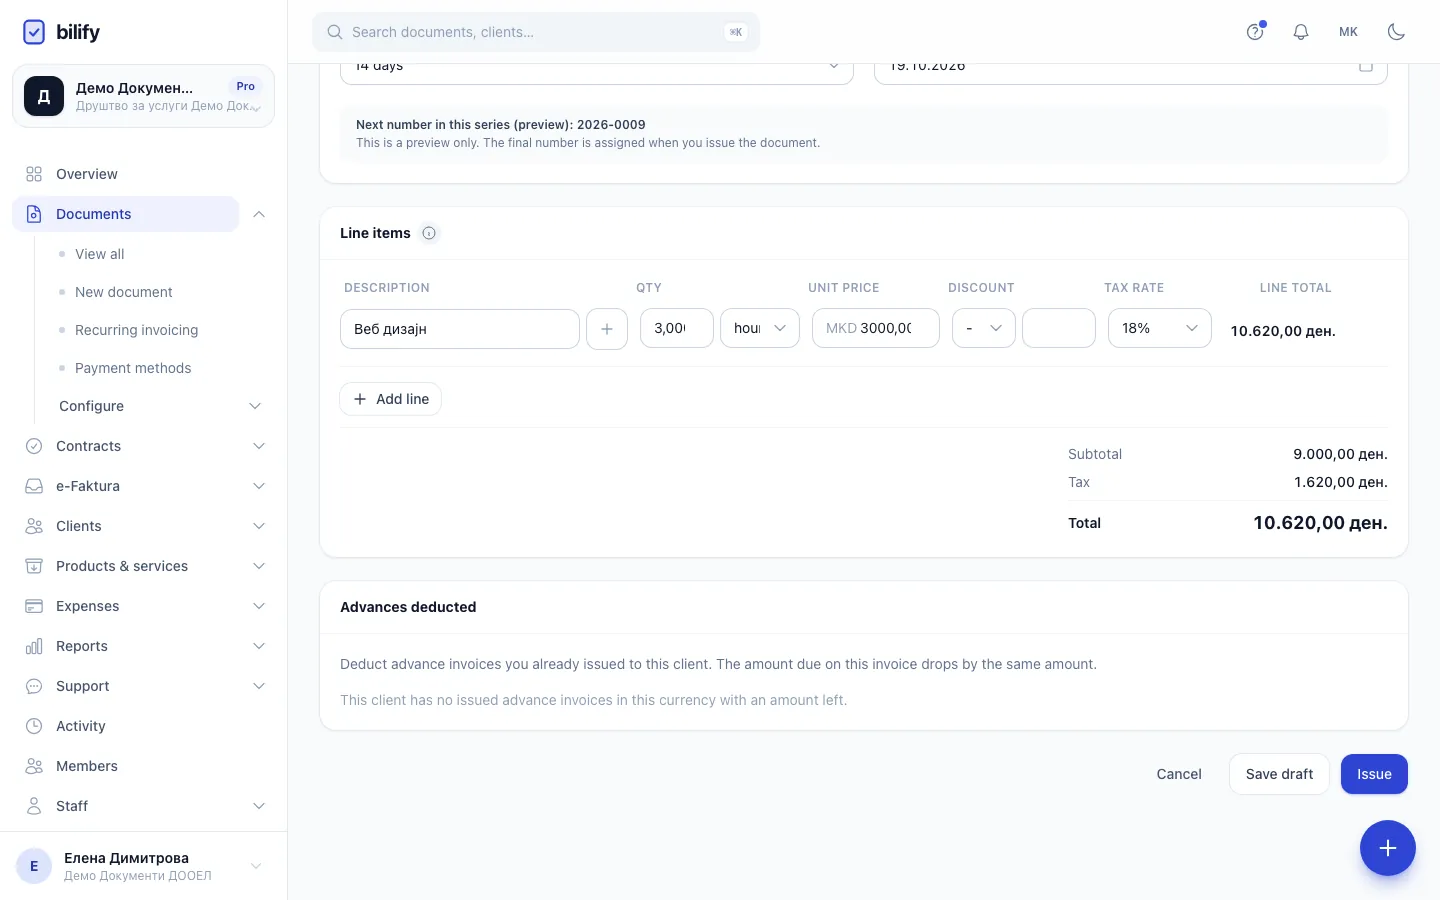
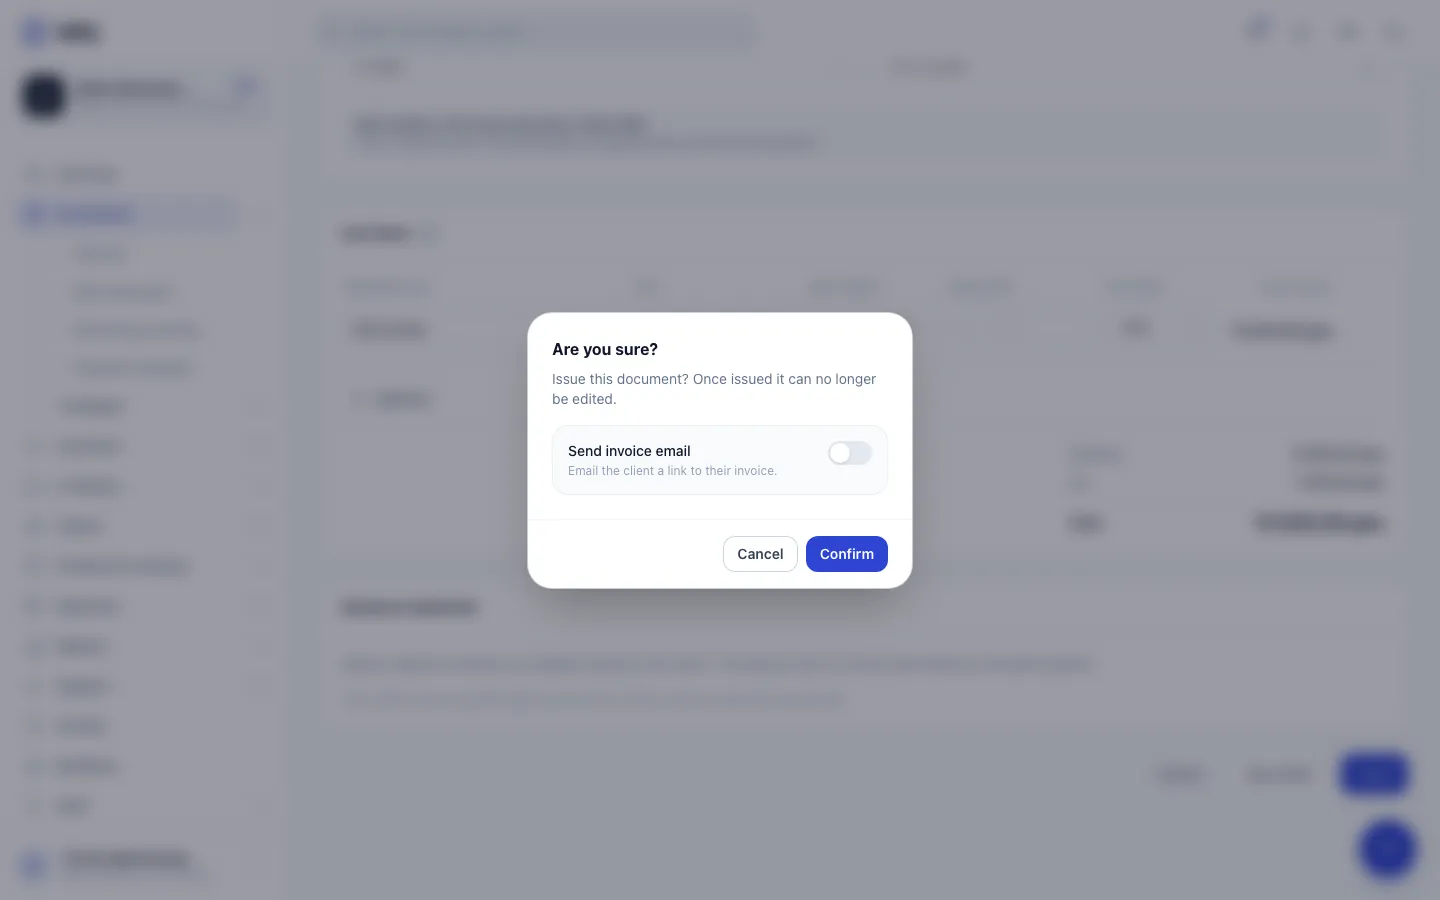
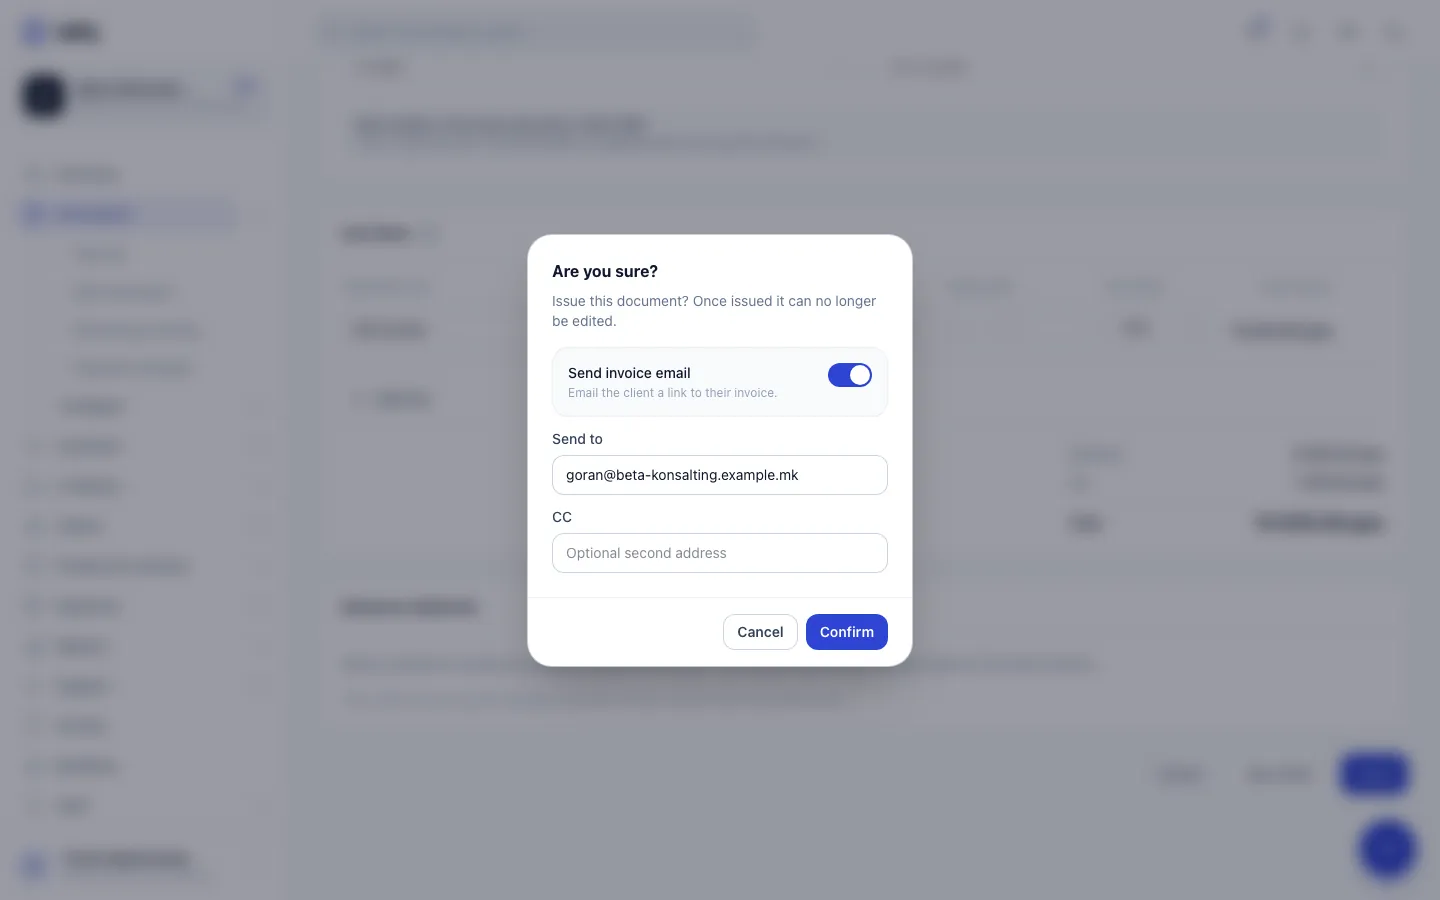
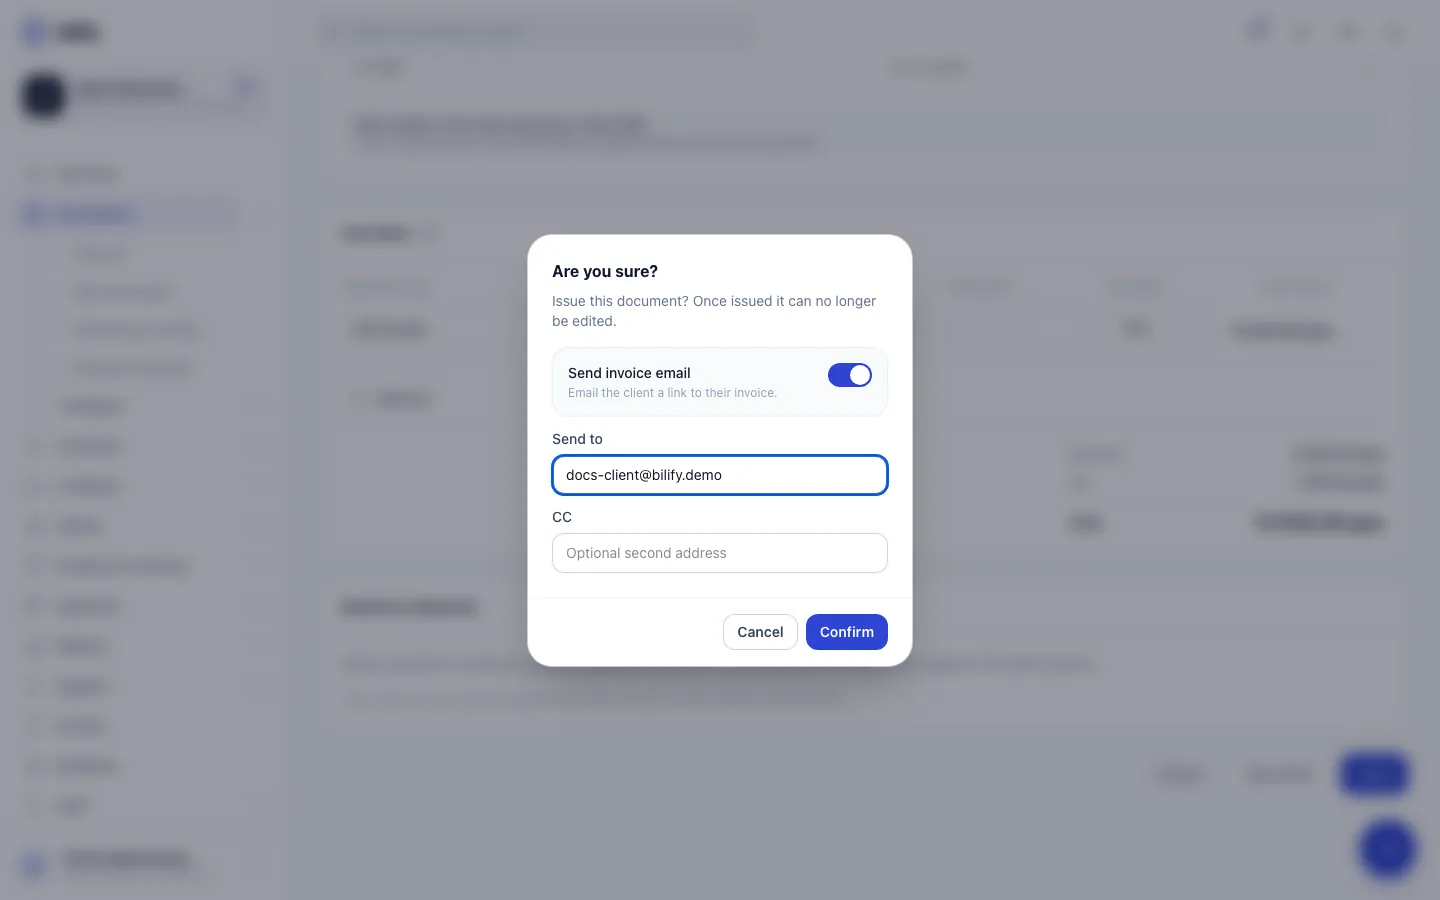
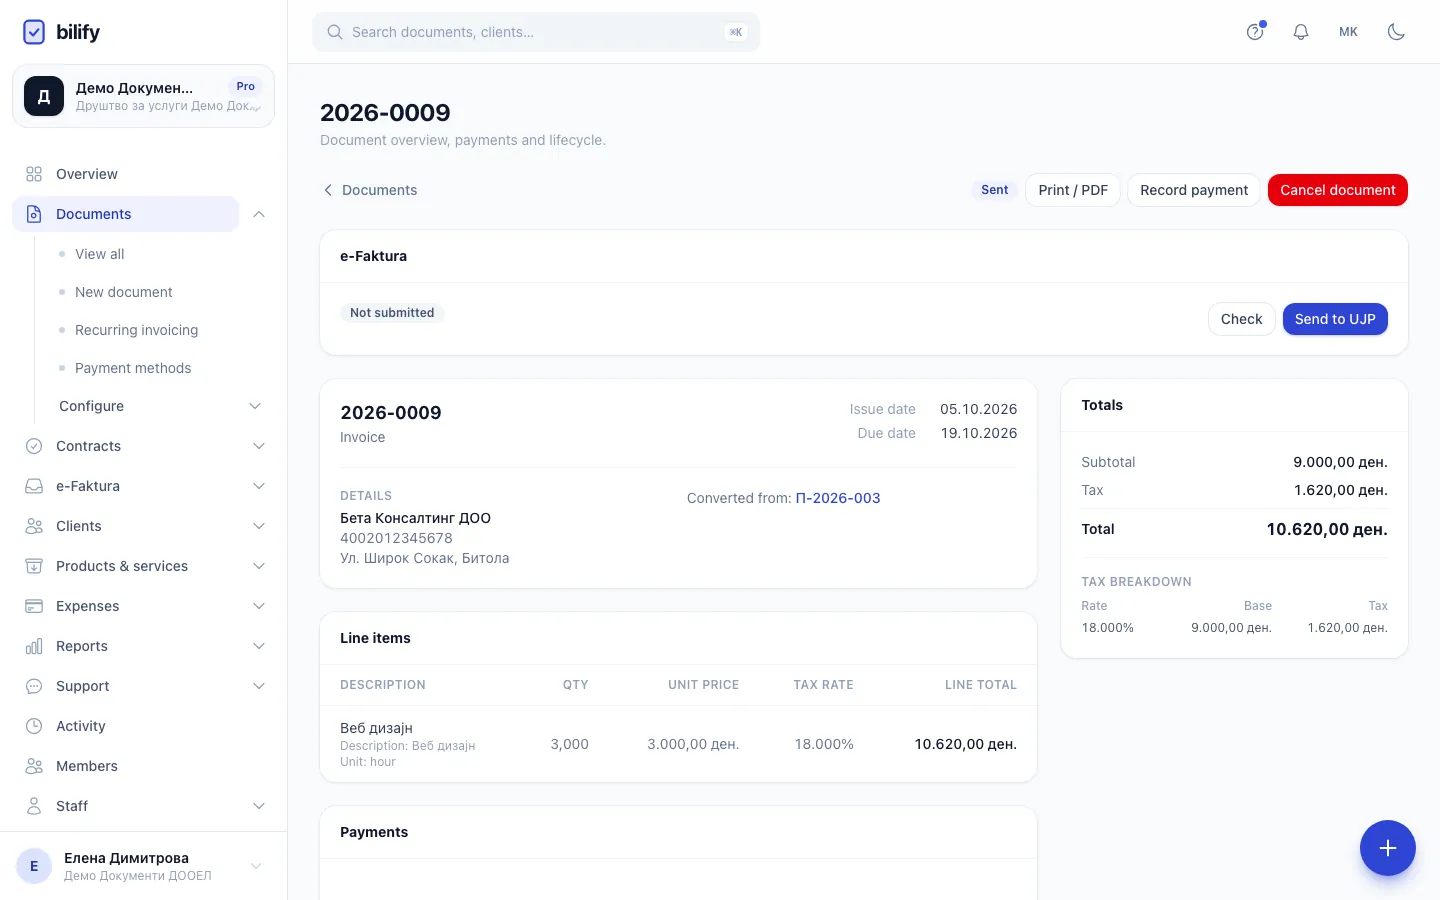
- Step 1: For this example we start from an issued offer and turn it into an Invoice draft. Open the actions menu.
- Step 2: Choose Convert to Invoice.
- Step 3: Confirm. Bilify opens the new draft with the client and lines filled in.
- Step 4: Check the lines and totals. After issuing they can no longer be changed.
- Step 5: Click Issue.
- Step 6: Switch on Send invoice email to email the client a link to the document now.
- Step 7: Send to is filled with the client's primary contact. Change it if needed and add a CC.
- Step 8: Confirm. The document gets its number, is locked, the email goes out and the status becomes Sent.
- Step 9: Print / PDF opens the print view, where you can save the document as a PDF.
- Open the draft from Documents (drafts show Draft instead of a number).
- Check the client, the lines and the totals.
- Click Issue. A confirmation asks "Issue this document? Once issued it can no longer be edited."
- To email the client now, switch on Send invoice email. Send to is pre-filled with the client's primary contact, or the client's own email. Change it if needed and optionally add one CC address.
- Click Confirm.
Bilify saves the draft, issues it and opens the issued document. If something is missing, the document stays a draft and the problems are listed at the top of the form, for example a required field, a line without a tax rate, a tax rate that is no longer valid, a missing numbering series, or a missing exchange rate for a foreign currency.
You need the permission to issue documents. Without it you can still prepare and save drafts for a colleague to issue.
What issuing does
In one step, Bilify:
- assigns the next number from the type's numbering series (or your custom number on an offer or pro-forma);
- dates the document today and sets the Date of supply if you left it empty;
- calculates the final totals and the VAT breakdown;
- freezes a copy of your company details, the client's details, the payment details and the document design;
- prints any legal notes the type requires, such as the Article 32 note;
- reduces stock for products, if the type does that and you track stock;
- creates the online payment link, if the payment method is a Stripe account.
An issued document is locked
After issuing you cannot edit the lines, the client, the amounts or the number, and you cannot delete the document. Later changes to the client, your company profile, tax rates or design do not alter it. If it is wrong, cancel it and issue a new one. See Cancel a document.
Requires: UJP e-Faktura integration
For Macedonian companies with e-Faktura switched on, issued invoices can also be sent to UJP, automatically or by hand. See Send invoices to UJP.
What the client receives
With Send invoice email on, the client gets an email from your company's name:
- the subject "Invoice [number] from [your company]", with the amount and the due date;
- your bank details from the payment method, or a Pay online button for a Stripe payment method;
- a View invoice button that opens the document in your client portal, valid for 30 days;
- a Portal sign-in link that keeps working after that.
No PDF is attached. The client opens the document from the link and can download or print it there. The email uses the same wording for every document type, including offers. Every email is recorded in the client's Email history and in the email log.
Sending later
The email can only be sent at the moment of issue. There is no button to resend it afterwards. To deliver an issued document later, open Print / PDF, save the PDF and send it yourself, or point the client to the portal.
Mark as sent
When you email the document with Send invoice email at issue, its status becomes Sent by itself. If you delivered it another way (by your own email, by post, in person), open it and click Mark as sent, then Confirm. The status changes to Sent. This button does not send anything.
When the client opens an Issued or Sent document in the portal, its status changes to Seen.
You can also do this from the status badge or the row menu on the Documents list.
After issuing
On the issued document you can:
- Print / PDF: see Print and download PDFs;
- Record payment (invoices only, not offers or pro-formas): see Record a payment;
- convert it into another type: see Convert documents;
- set Due-date reminders for this document to Use company default, Always send or Never send;
- Cancel document.
Was this page helpful?
Related articles
Still stuck?
Write to us and we will get back to you within one working day.