Export documents
Export the documents you select to a CSV or Excel file, download it straight away or have it emailed to you.
Export a hand-picked set of documents to a spreadsheet, for your accountant or your own records. For exports by period (for example every invoice issued last month), use a report instead. See Run a report.
Export a selection
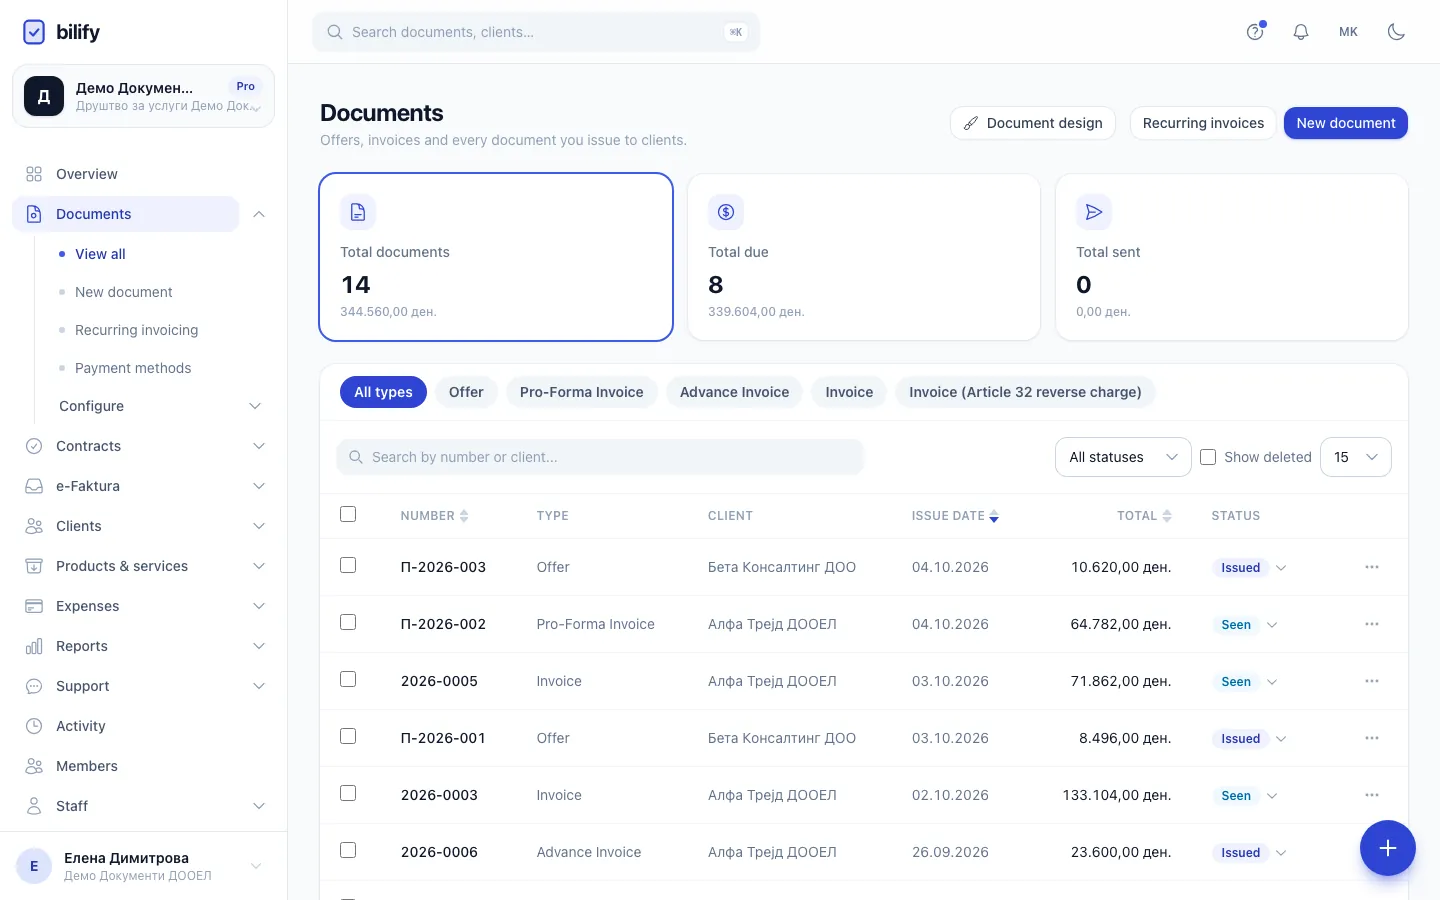
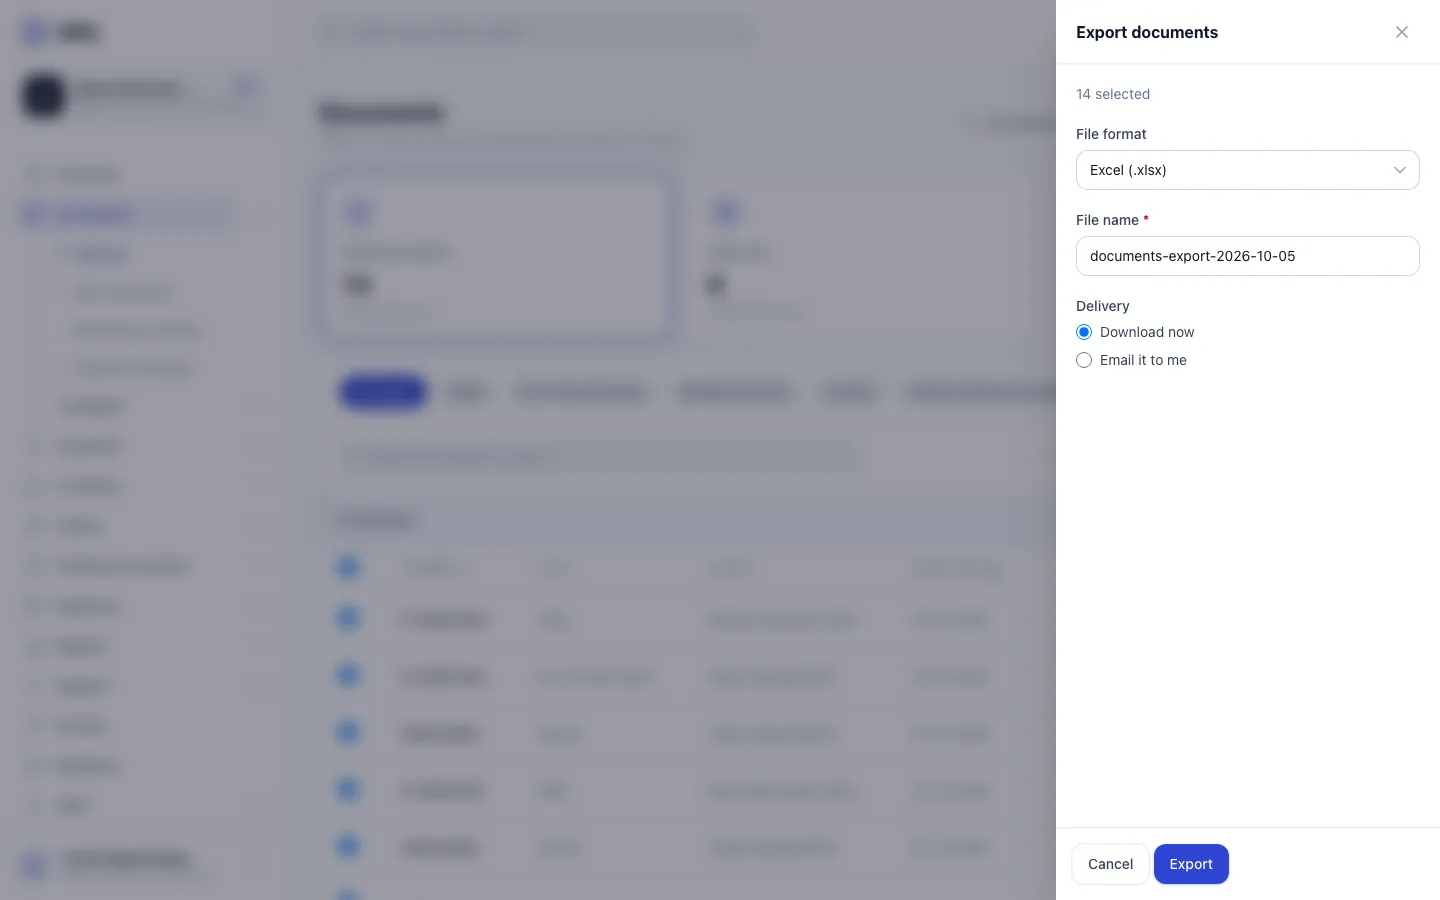
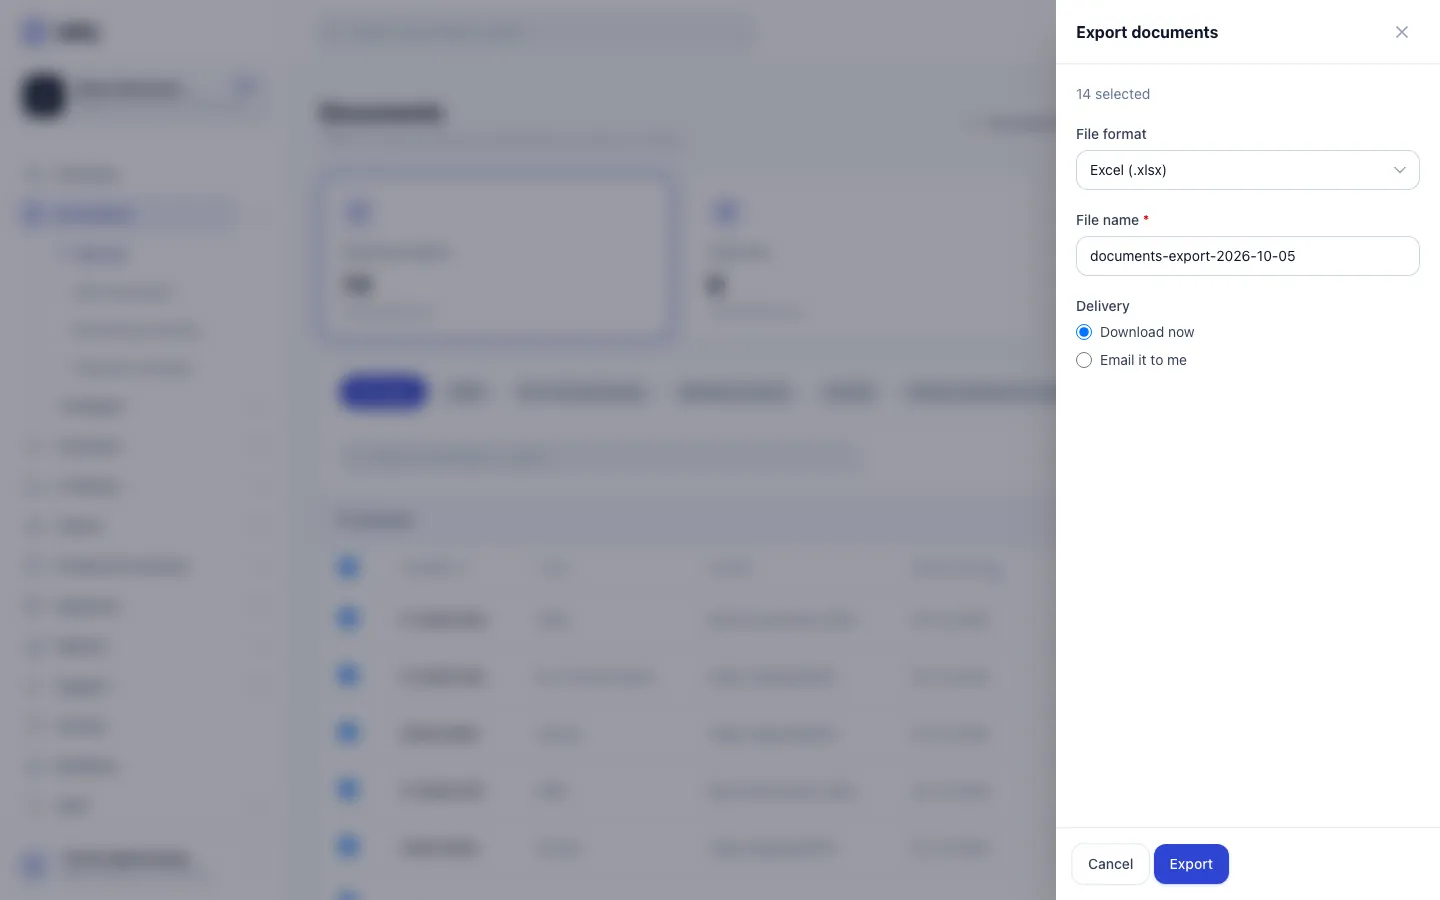
- Step 1: Narrow the list first if you like, for example to one document type.
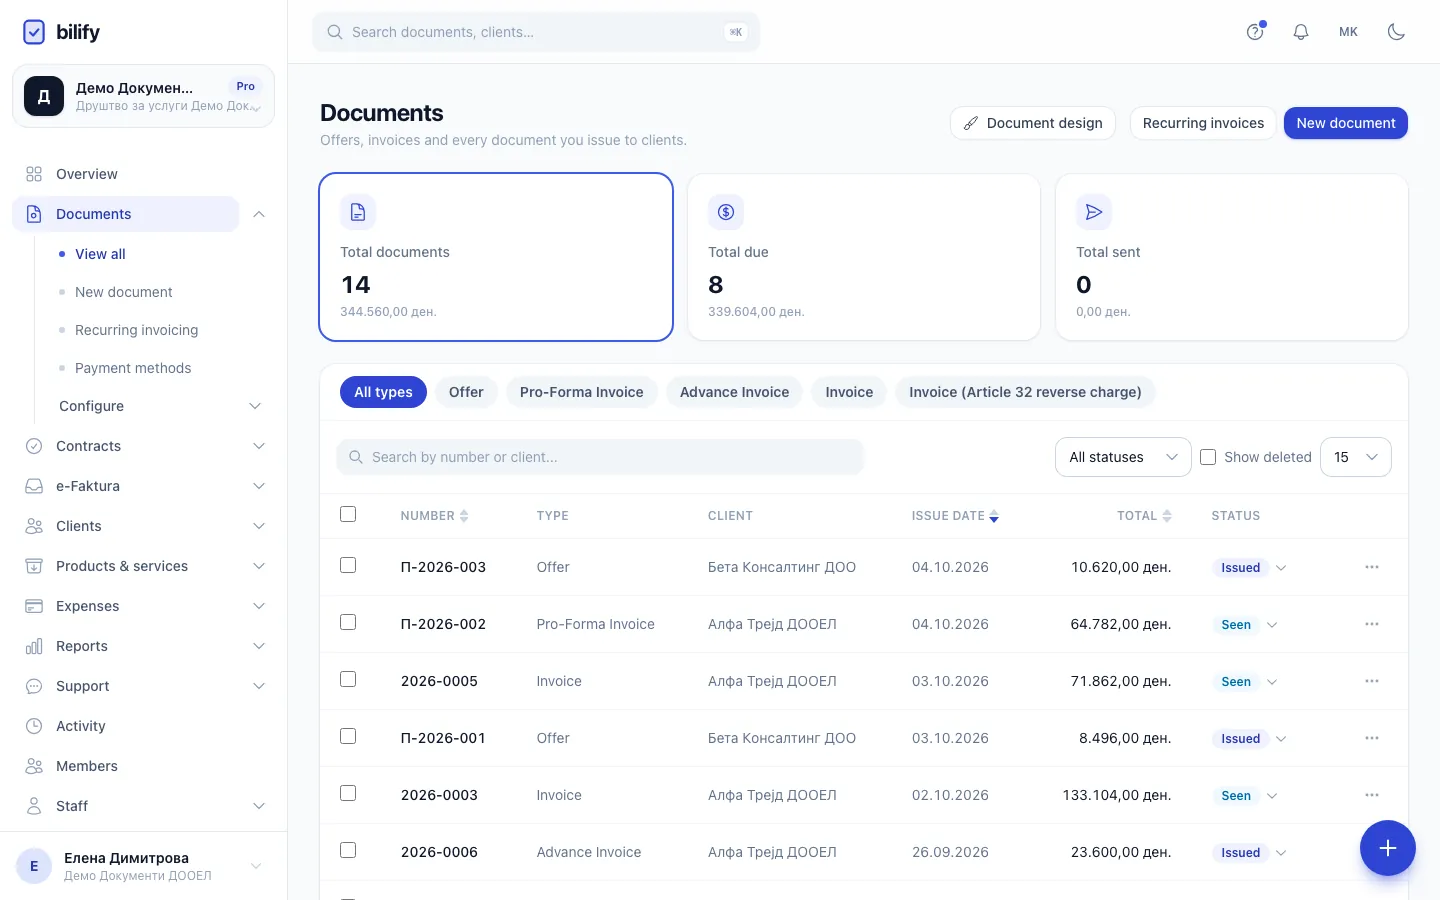
- Step 2: Tick the documents to export. The header checkbox selects the whole page.
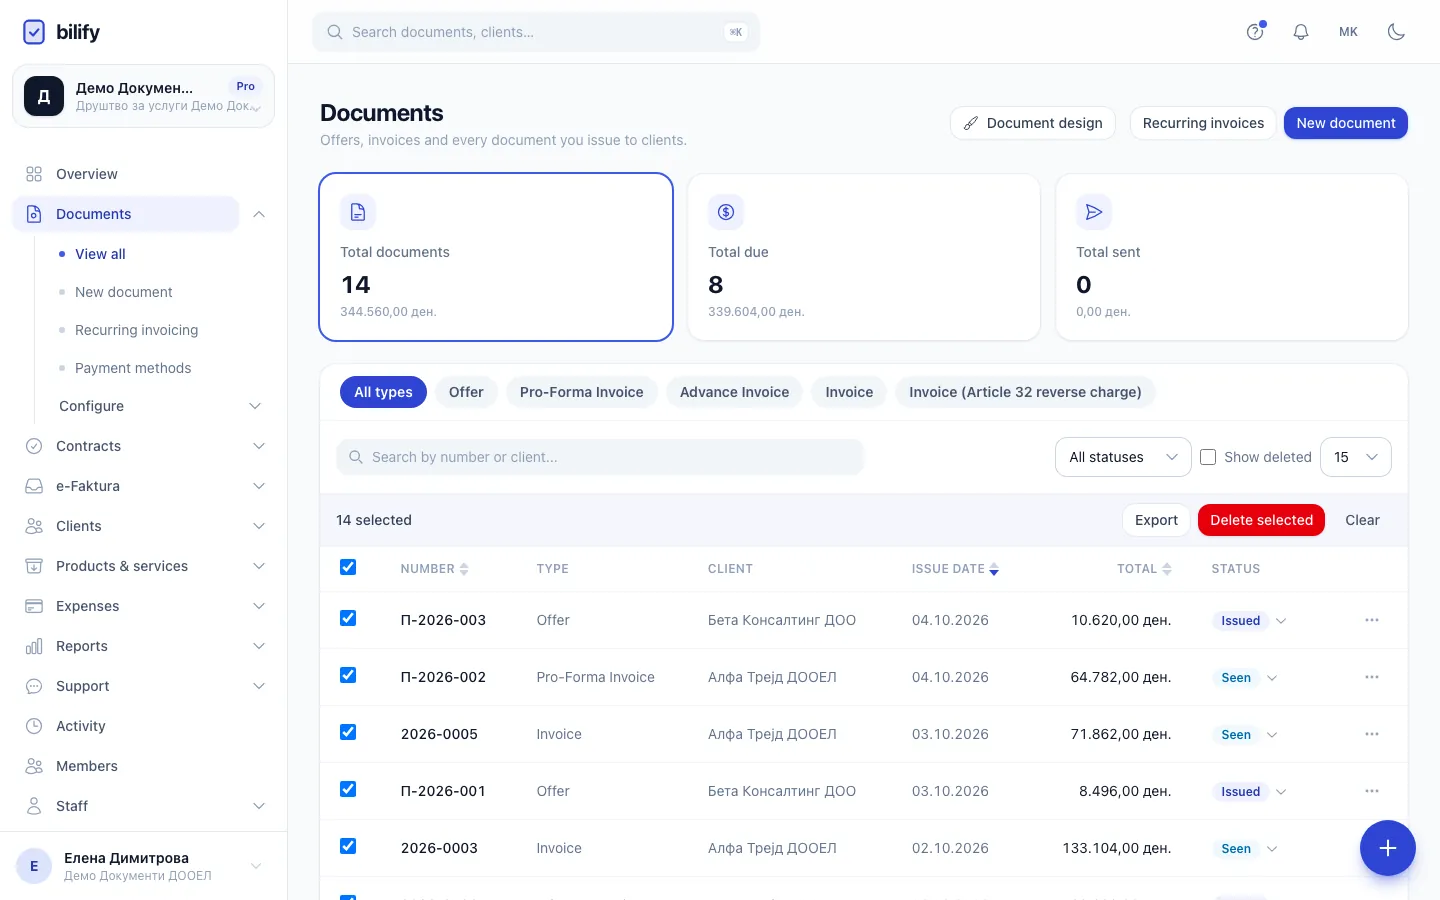
- Step 3: Click Export in the selection bar.
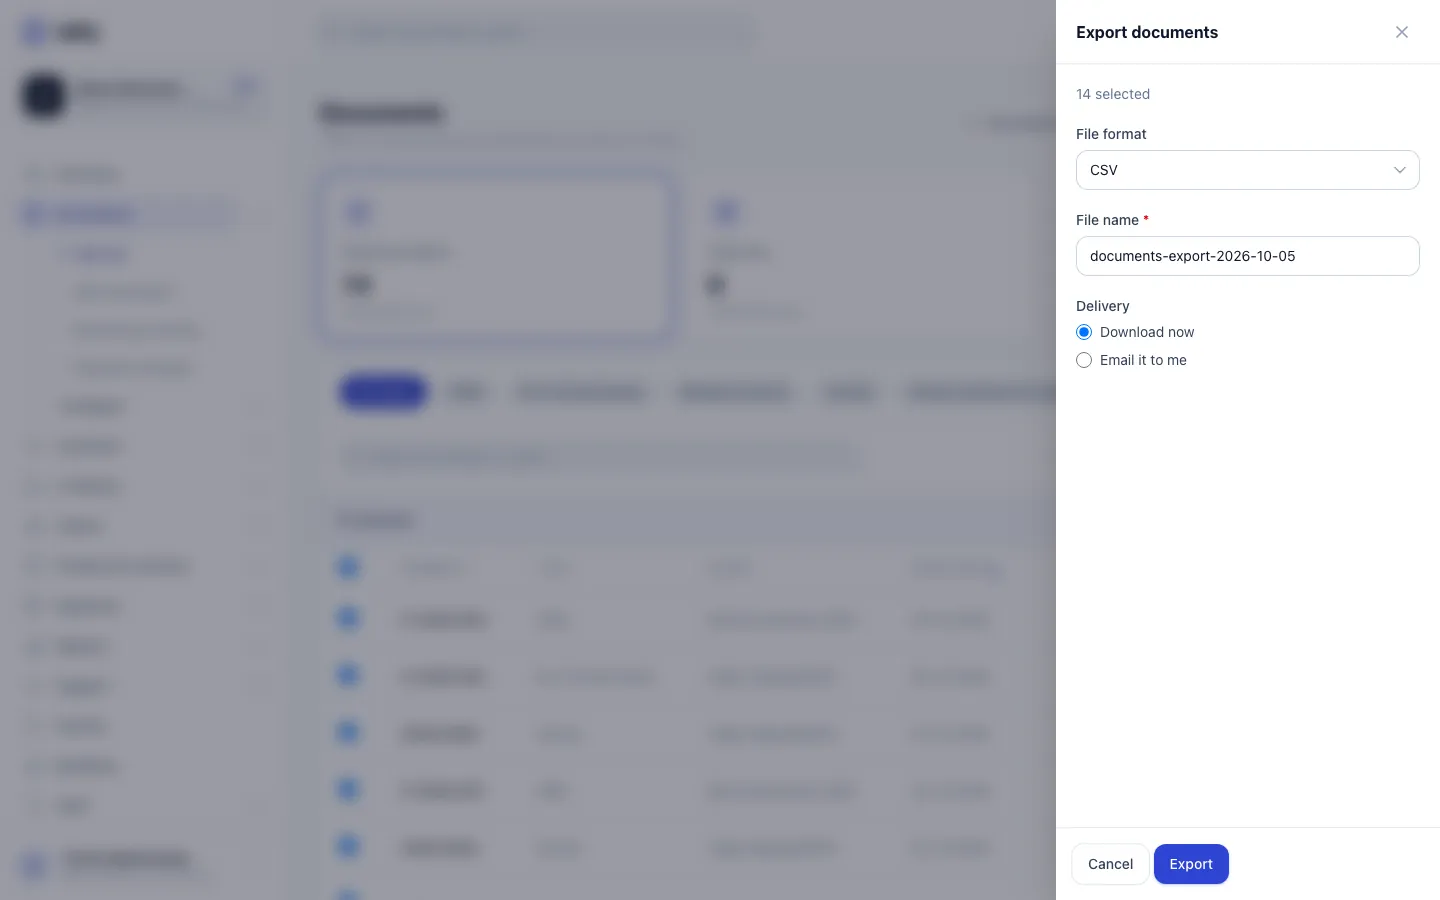
- Step 4: Choose CSV or Excel.
- Step 5: Check the file name. It starts with today's date.
- Step 6: Choose Download now or Email it to me, then click Export.
- Open Documents. Narrow the list first if it helps: click a type above the list (for example Invoice), pick a status, or search by number or client.
- Tick the documents you want. The checkbox in the table header selects every document on the current page. To select more at once, raise the number of rows per page to 30 or 50 first.
- Click Export in the bar that appears above the list.
- In Export documents, choose the File format: CSV or Excel (.xlsx).
- Check the File name. It starts as
documents-export-plus today's date. - Under Delivery, choose Download now or Email it to me. For email, check the Email address (yours is filled in).
- Click Export.
With Download now, Bilify shows "Your export is ready. The download should start shortly." and your browser downloads the file. With Email it to me, the file is sent to the address you entered.
What the file contains
One row per document, with these columns: number, type, client, issue date, due date, status, subtotal, tax, total and currency.
- Amounts are in each document's own currency. Use the currency column when you add them up.
- The client name is the one frozen on the document when it was issued.
- Drafts you tick are included, but have no number, no client and zero amounts, because they have not been issued. Leave drafts out of the selection for a clean file.
Selection, not a period
The export contains exactly the documents you ticked. Selecting works page by page, so very large exports are easier through Report types such as the documents export report, which takes a date range.
You need permission to view documents. The Export button appears for everyone who can open the Documents list.
Was this page helpful?
Related articles
Still stuck?
Write to us and we will get back to you within one working day.