Connect e-Faktura
Fill in your UJP identity, upload the qualified certificate, verify the connection and switch e-Faktura on for your company.
Connect your company to e-Faktura on one settings page: enter the identity values UJP gave you, upload the certificate, verify, and switch the module on. Have the values from Before you start at hand.
Open Settings > e-Faktura. The page is there only for Macedonian companies, and you need the Manage settings and certificate permission to change it (owners, admins and accountants have it).
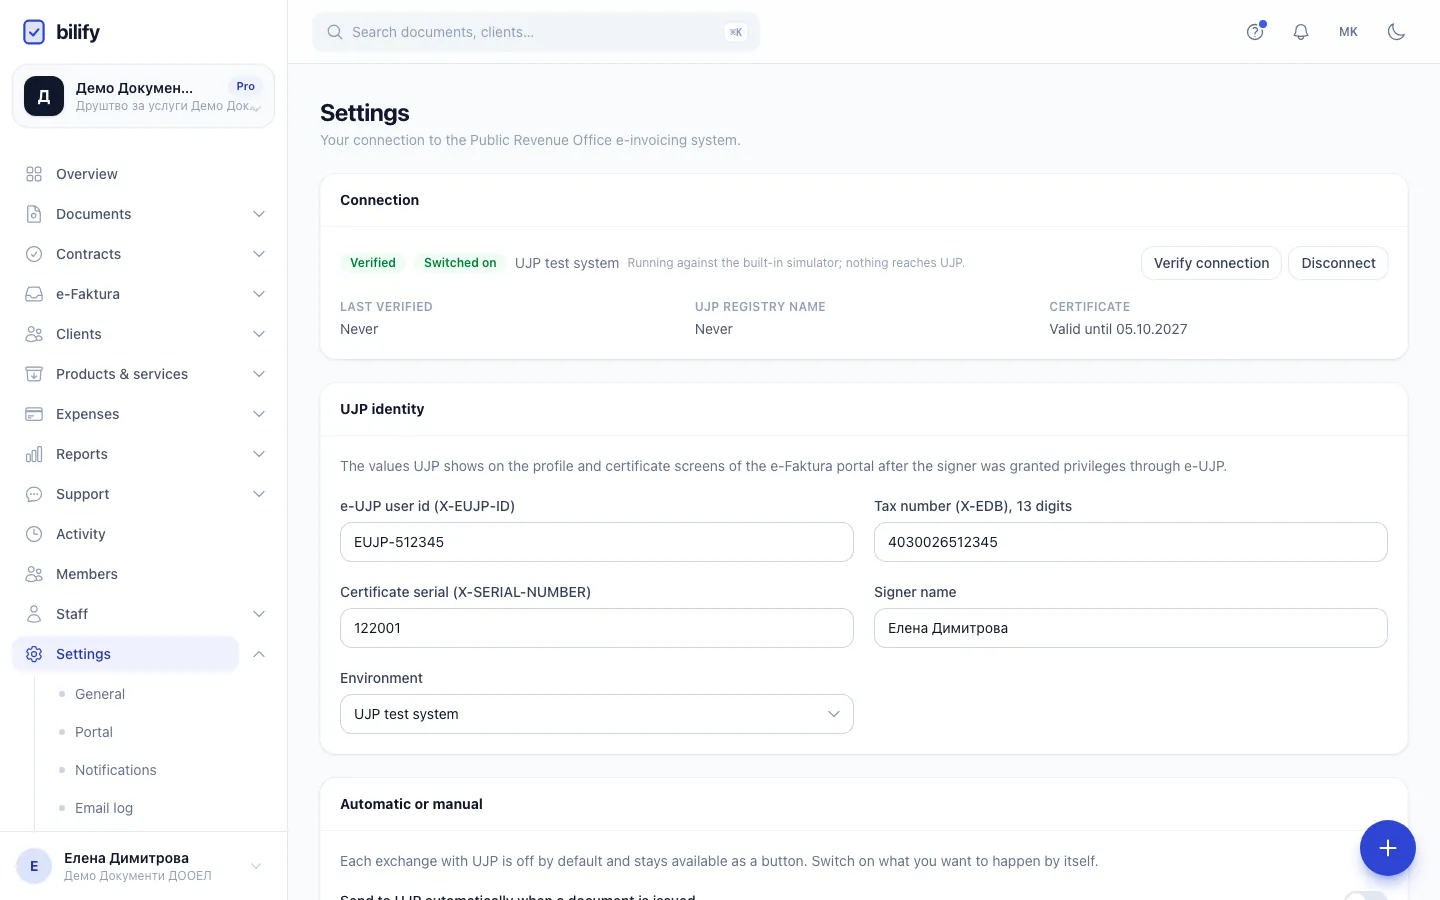
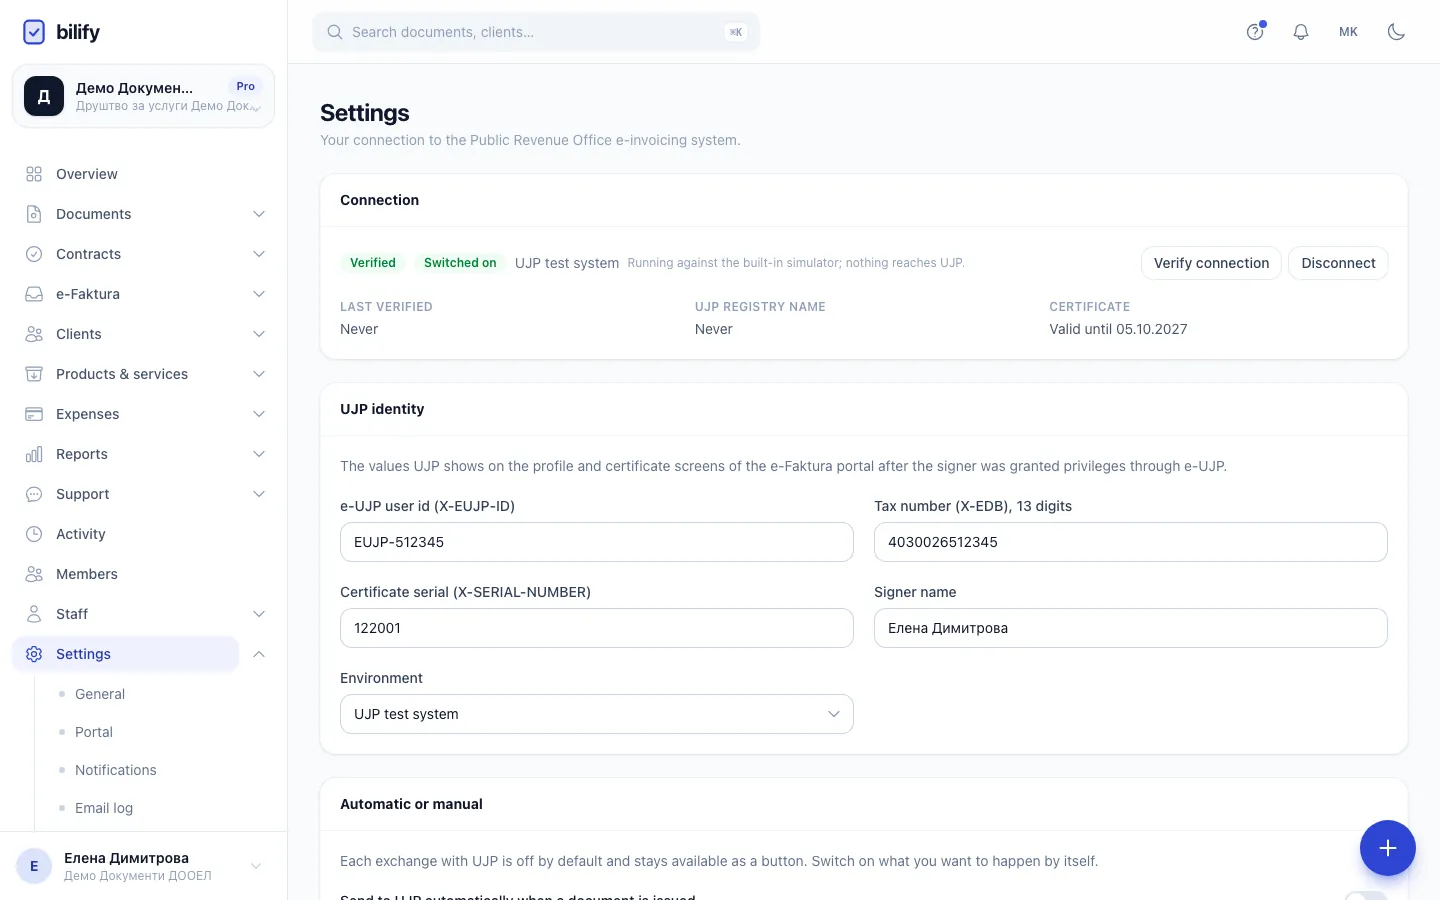
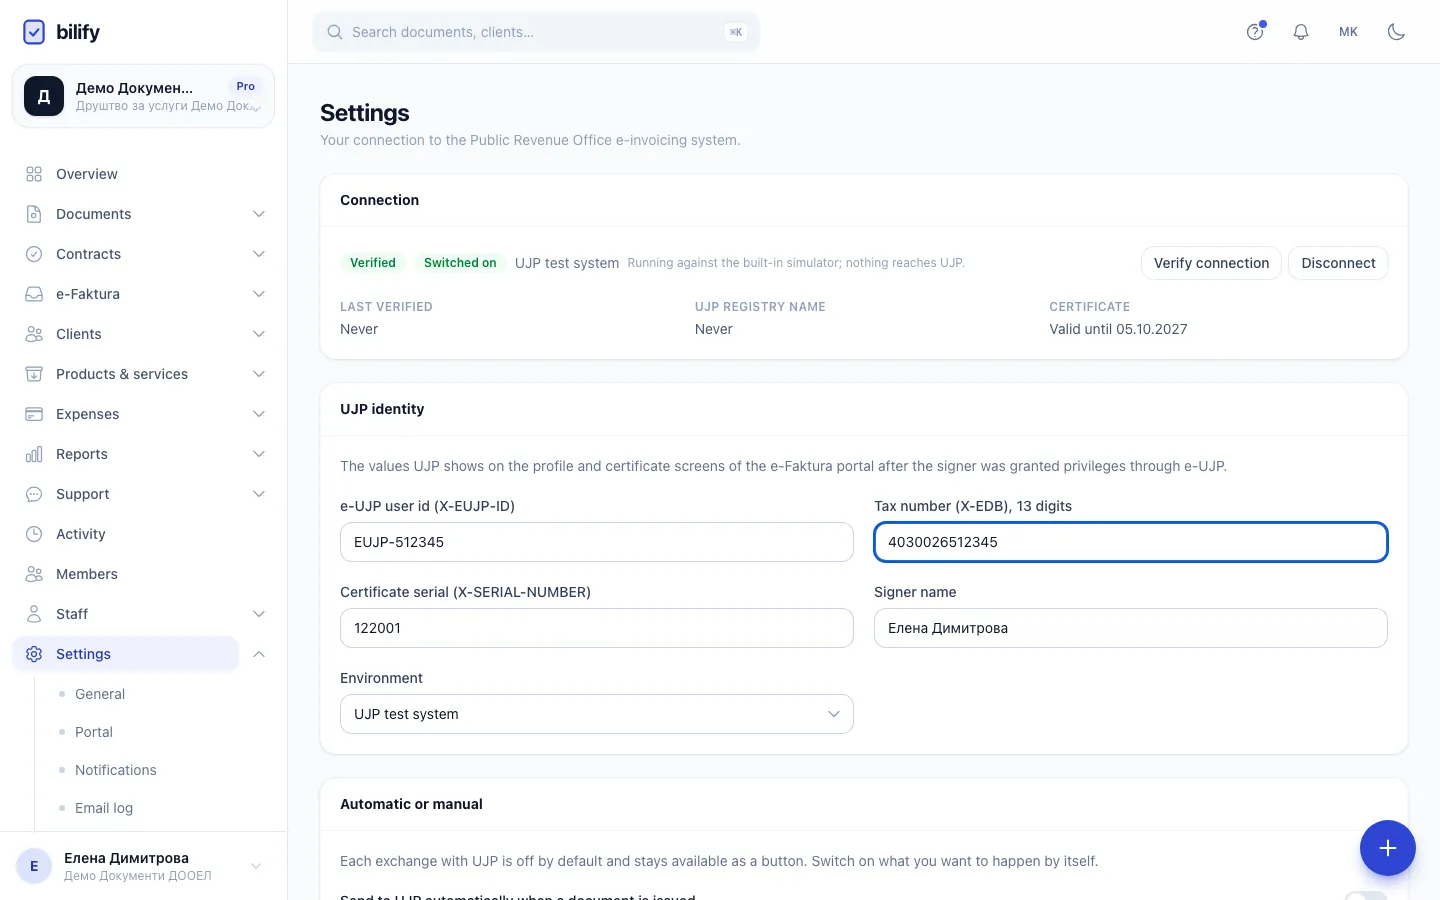
- Step 1: The Connection card shows whether e-Faktura is verified and switched on, the environment and when the certificate expires.
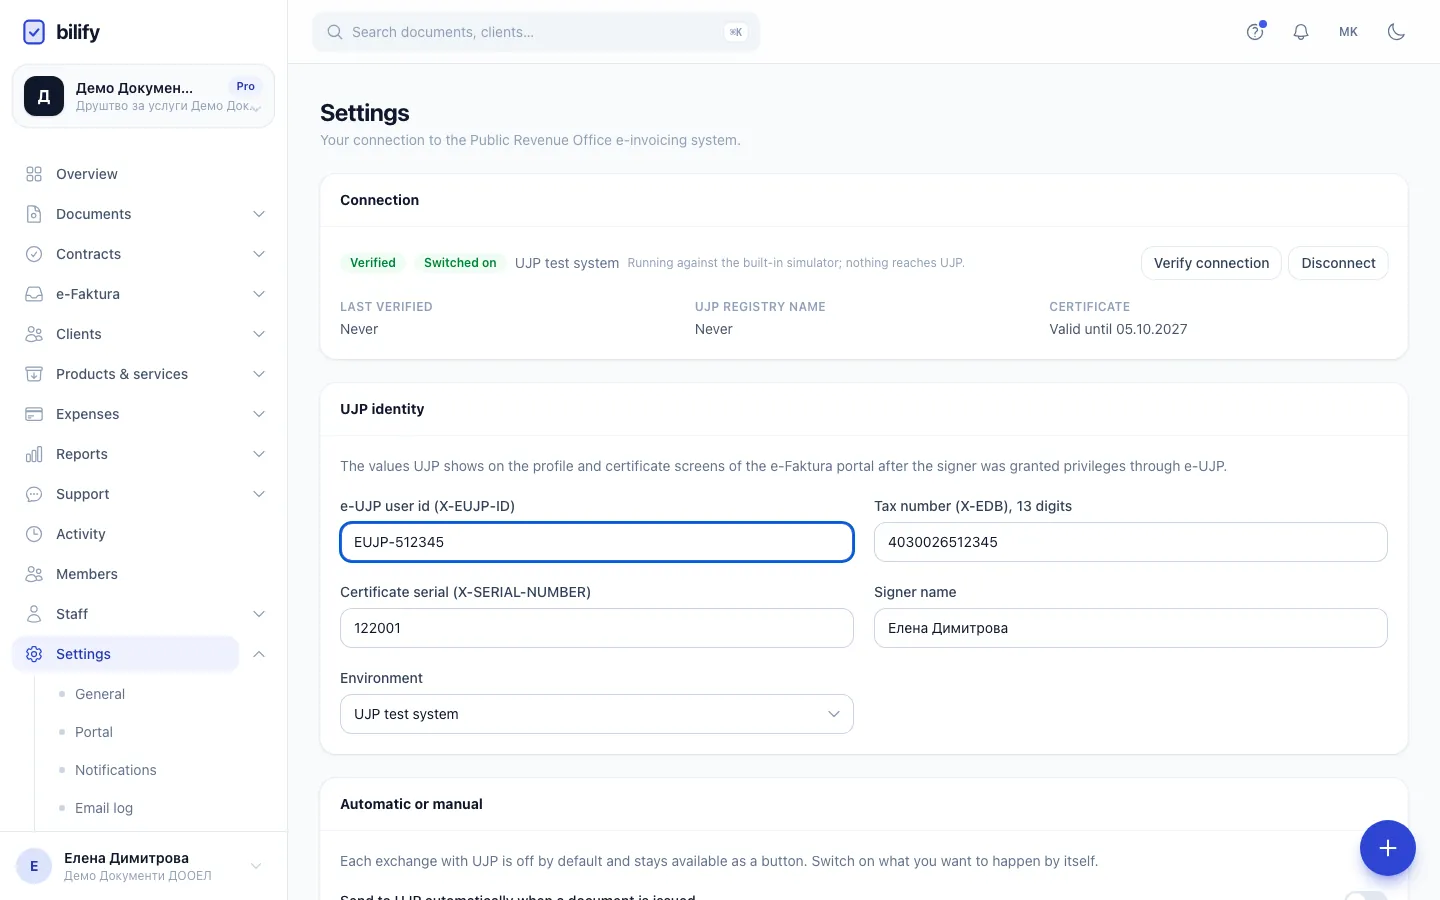
- Step 2: Enter the e-UJP user id that the e-Faktura portal shows on its profile screen.
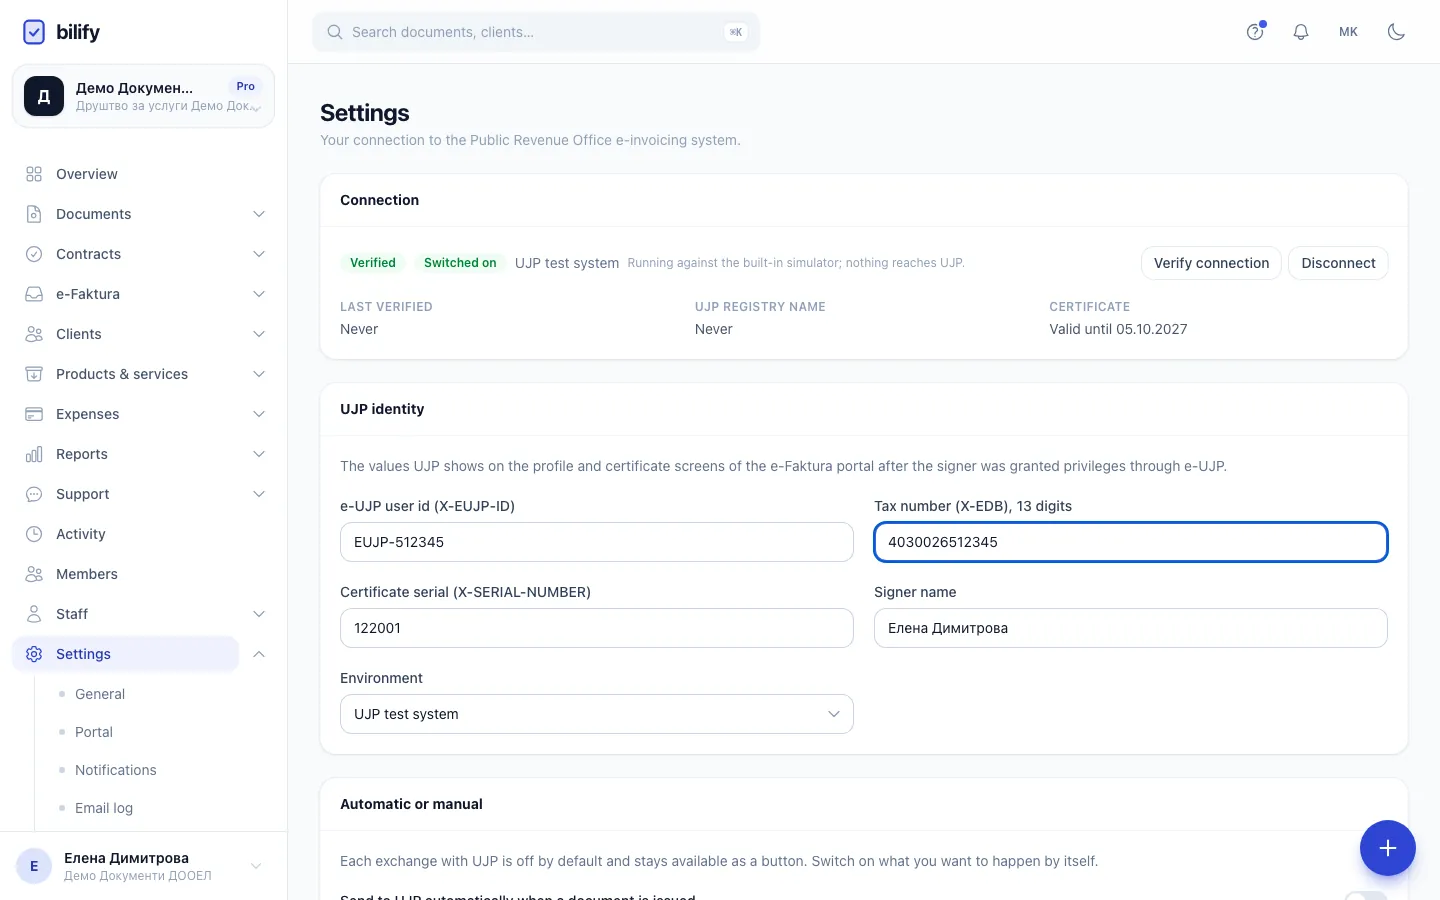
- Step 3: Check the company tax number. It is prefilled from General settings and must have exactly 13 digits.
- Step 4: The certificate serial and signer name fill in from the certificate when you upload it.
- Step 5: Choose the UJP test or production system. Until the live connection exists, both run on the simulator.
- Step 6: Save the identity and the other settings on this page.
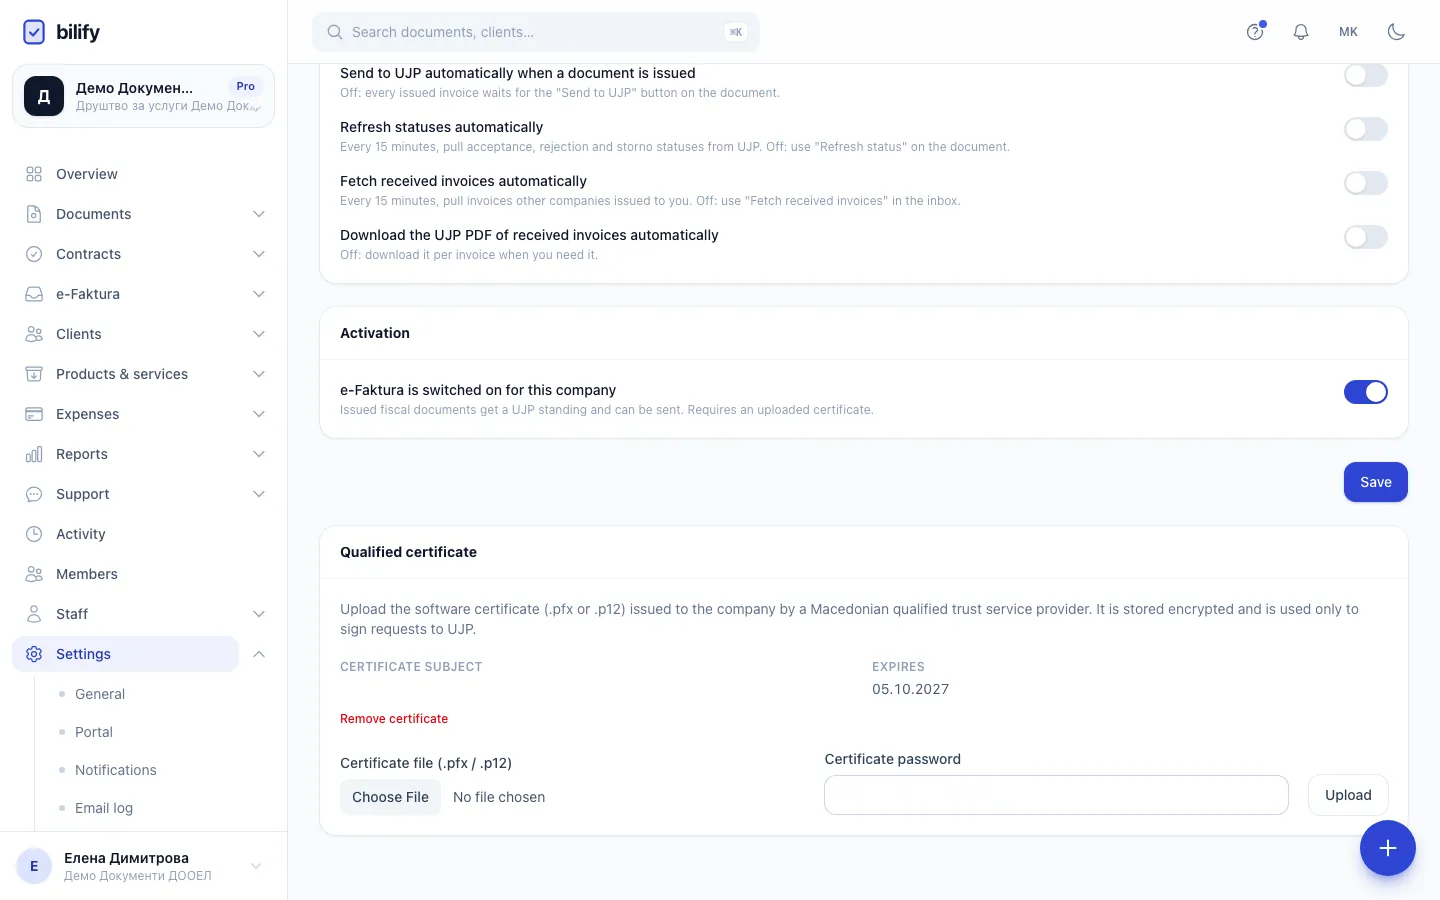
- Step 7: Next, upload the company's .pfx or .p12 certificate with its password, then verify the connection.
1. Fill in the UJP identity
- In the UJP identity card, enter e-УЈП user id (X-EUJP-ID) from the profile screen of the e-Faktura portal.
- Check Tax number (X-EDB), 13 digits. Bilify prefills it from the company tax number under Settings > General; it must be exactly 13 digits.
- Leave Certificate serial (X-SERIAL-NUMBER) empty for now if you have not uploaded the certificate: Bilify fills it from the file. If UJP's certificate screen shows the serial in another form, type UJP's value here after the upload.
- Signer name is also filled from the certificate. Correct it if needed.
- Choose the Environment: UJP test system or UJP production system.
- Click Save.
The environment does not change the simulator
While Bilify runs on the built-in simulator, both environments are simulated and nothing reaches UJP. The production connection is not live yet; see What is e-Faktura.
2. Upload the certificate
The Qualified certificate card is a separate form, so picking a file never saves the other settings.
- Under Certificate file (.pfx / .p12), choose the file. Only
.pfxand.p12files up to 64 KB are accepted. - Enter the Certificate password.
- Click Upload.
Bilify opens the file with the password and stores the certificate encrypted. It is used only to sign requests to UJP and is never shown again or sent to your browser. After a successful upload the card shows:
- Certificate subject: the name and identifiers the certificate was issued to.
- Expires: the last day it is valid.
- The Connection card shows Valid until with the same date, and Certificate serial (X-SERIAL-NUMBER) and Signer name are filled from the new certificate. Uploading a replacement always takes the serial and signer of the new file.
If the file cannot be opened you see: The file could not be opened with that password. Check that it is a .pfx/.p12 bundle and the password is correct.
Tax number mismatch
If the certificate subject does not contain the company tax number, the certificate is still stored but you see: The certificate was stored, but its subject does not contain the company tax number. UJP rejects signatures from a certificate issued to another taxpayer. Check that you uploaded the company's certificate and that the tax number under Settings > General is right.
3. Verify the connection
Upload the certificate first: verification signs a request with it, so it does not run without one.
Click Verify connection in the Connection card. Bilify first saves the identity fields on screen, then:
- reads UJP's server time,
- looks up your tax number in UJP's taxpayer register,
- sends a request signed with your certificate.
On success the status becomes Verified, Last verified shows the time and UJP registry name shows your company's name as UJP has it. On failure the status becomes Error and a red box shows the reason with UJP's error code. See Troubleshooting.
4. Switch e-Faktura on
- In the Activation card, turn on e-Faktura is switched on for this company.
- Click Save.
Switching on needs an uploaded certificate; without one you see Upload a certificate before switching e-Faktura on. Once it is on, the Connection card shows Switched on, the e-Faktura card appears on issued invoices and e-Faktura > Received invoices appears in the menu.
What "ready to send" means
Sending works when the module is switched on, the e-UJP id, tax number and certificate serial are filled in, and a certificate is uploaded and not expired. A failed Verify connection does not block sending by itself, but UJP will usually reject what failed verification.
Statuses on the Connection card
| Badge | Meaning |
|---|---|
| Not verified | Settings saved or a new certificate uploaded, not verified since. |
| Verified | The last verification succeeded. |
| Error | The last verification failed; the message is shown below. |
| Switched on / Switched off | Whether the module is active for the company. |
Remove the certificate or disconnect
- Remove certificate (under the certificate details) deletes the stored certificate together with its serial and signer name, and switches e-Faktura off. Sending stops until you upload a new one. Use it when the certificate is replaced or compromised.
- Disconnect removes the whole e-Faktura connection, including the identity values, automation choices and the certificate. The e-Faktura card, the inbox and the menu entry disappear. Invoices already registered keep their EUID and status in Bilify.
Both ask for confirmation first.
Connecting, uploading or removing a certificate, verifying and disconnecting are all recorded in the activity log, with who did it and when.
Was this page helpful?
Related articles
Still stuck?
Write to us and we will get back to you within one working day.